MotoGP crash types explained: highsides, lowsides, front-end losses and more
Crashes in MotoGP follow recognisable patterns. Understanding highsides, lowsides, front-end losses, rear slides, contact incidents and braking-zone crashes helps fans read what they see on TV and explains what riders and teams do to prevent and mitigate risk.
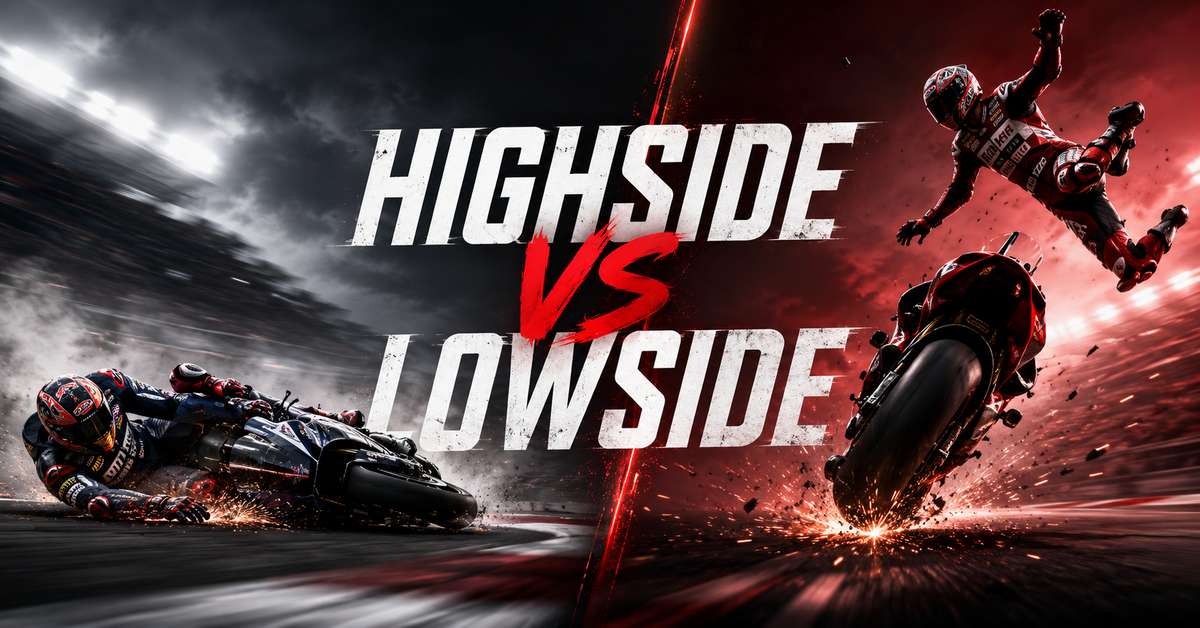
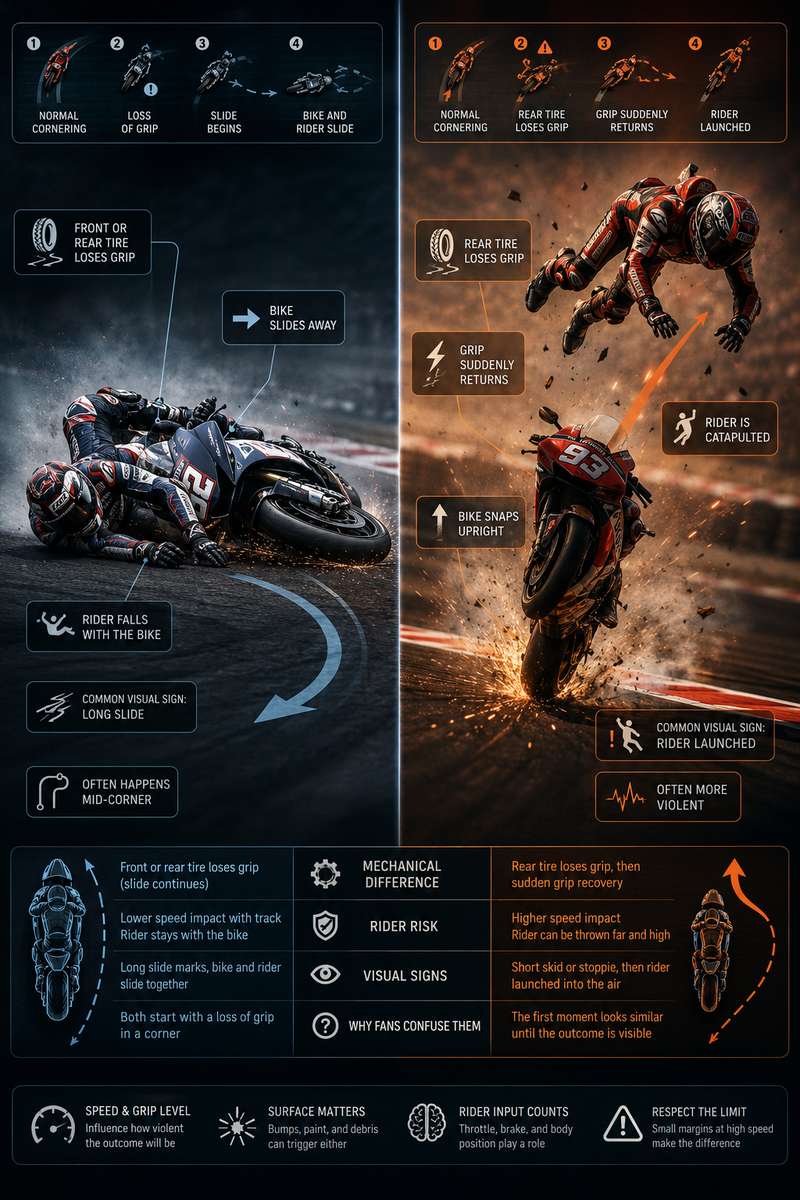
Quick summary: Highsides happen when a sliding rear tyre suddenly regains grip and violently flips the bike; lowsides are less violent slides toward the inside; front-end losses are when the front tyre folds under; rear slides can be controlled or destabilising; contact and braking-zone incidents are separate, common causes.
Clear definition
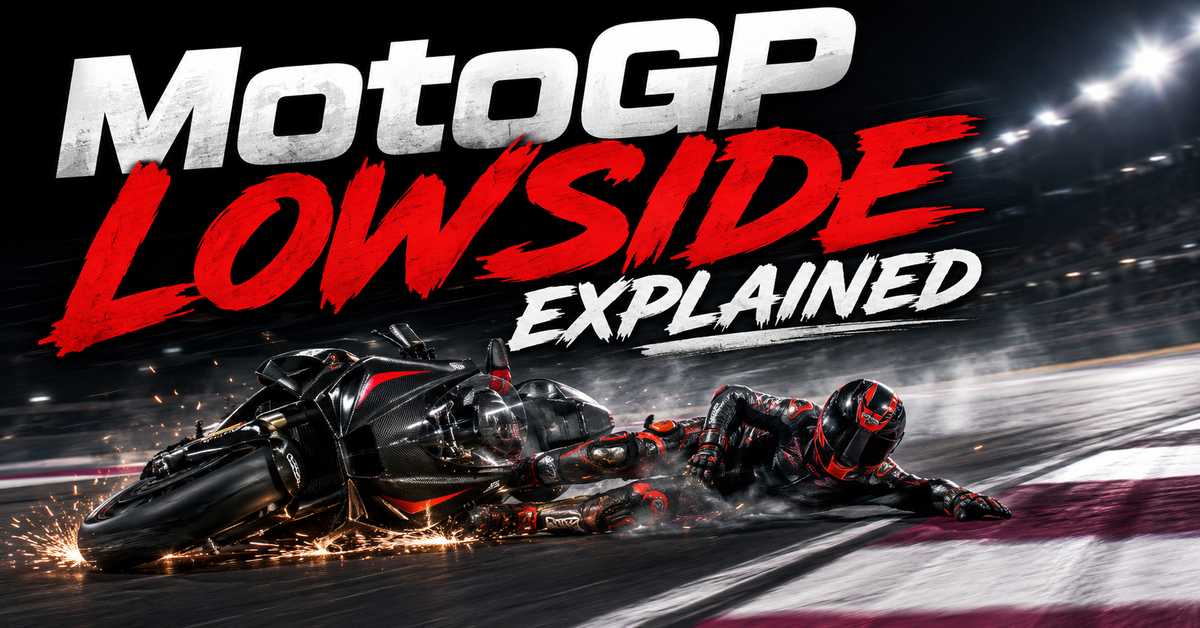
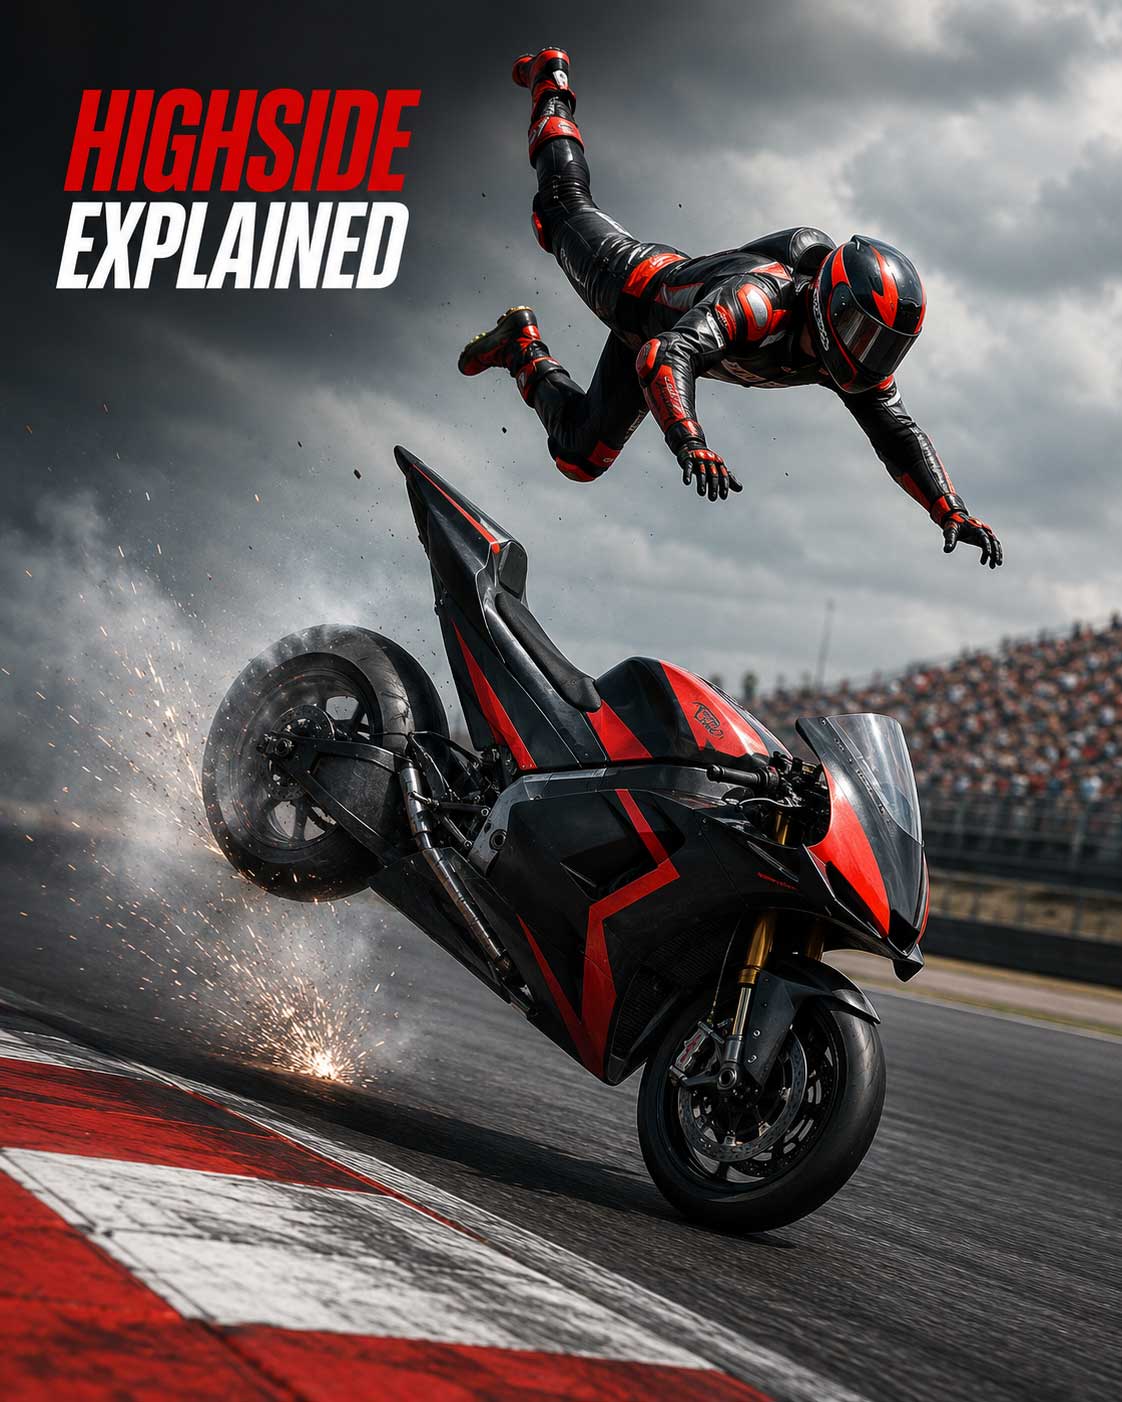
"MotoGP crash types explained" boils down to a few repeatable mechanisms. A highside occurs when the rear tyre loses lateral traction and then suddenly regains it, flipping the bike and often ejecting the rider. A lowside happens when a tyre (front or rear) loses grip and the bike and rider slide out together toward the inside of the corner; it is usually less violent than a highside. A front-end loss — sometimes described as a fold or front-end slide — is when the front tyre loses lateral grip, causing the bike to collapse or topple. Rear slides refer to the rear tyre losing traction while leaned or accelerating; that slide can be managed or can lead to a lowside or a highside if grip returns abruptly. Contact incidents are collisions or touches between riders that directly precipitate crashes. Braking-zone crashes are those that occur while braking into a corner, often from overloading or grabbing the front tyre.
How it happens or how it works
These crash types share common physical causes: tyre traction limits and rapid transitions of forces. Highsides start with a rear loss: lateral forces exceed rear tyre grip, the tyre slides, and then a sudden regain of traction—or an abrupt throttle or electronics reaction—snaps the bike upright and catapults the rider. Lowsides occur when grip is lost and not re-established, so the bike and rider slide out and usually come to rest on the inside of the turn. Front-end losses commonly happen at turn-in or under heavy braking when the front tyre is overloaded and its contact patch gives way, causing a fold or slide over the handlebars.
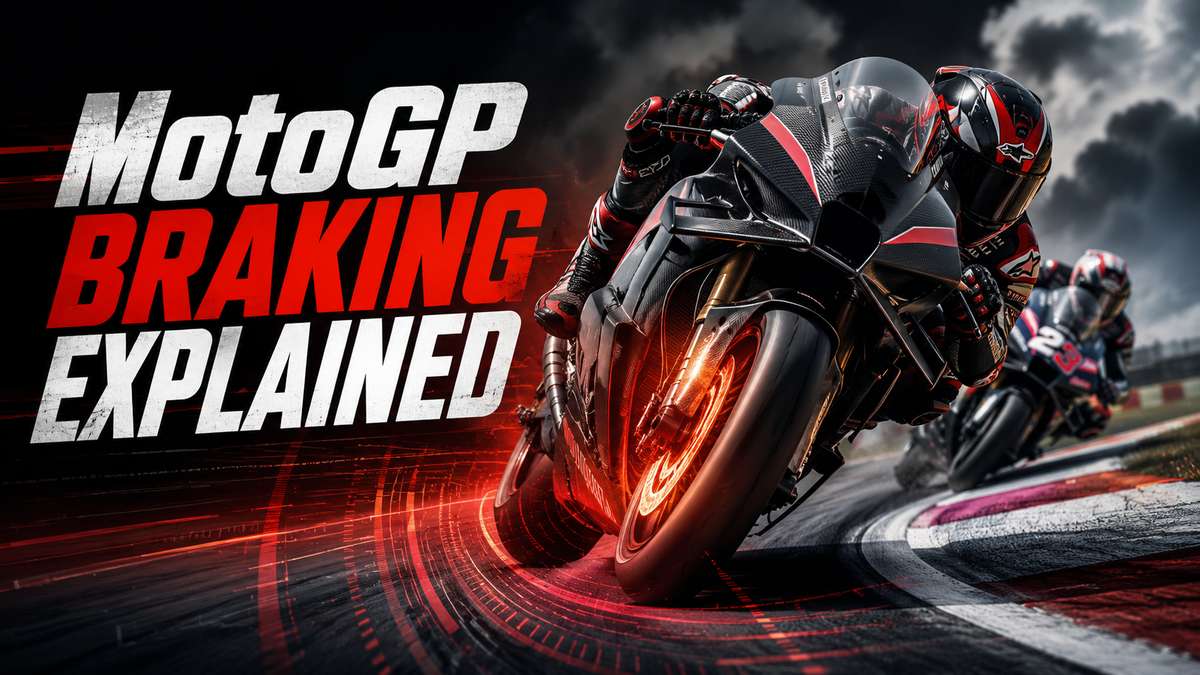
Rear slides are a broader category: some are controllable, used by riders to manage corner speed or adapt to rear grip changes; others run away into a lowside or, if traction returns too fast, the more dangerous highside. Contact incidents can be caused by small touches—handlebar to handlebar, wheel-to-wheel—or by misjudged overtakes; the direct mechanical interference removes control and leads to a crash. Braking-zone crashes arise from exceeding front tyre limits (locked or grabbed front-end) or from instability introduced by uneven braking inputs, which can transform a heavy-braking situation into a front-end fold or other fall.
Rider technique
Riders manage these risks with precise inputs. To avoid rear slides and highsides they modulate throttle and use body position to control load on the rear tyre; traction control and engine-brake settings are tuned to soften sudden grip returns. To prevent front-end losses they refine braking strategy and turn-in speed, shifting weight and smoothing steering inputs to keep the front contact patch within grip limits. In braking zones riders must judge late braking without overloading the front; quick corrections or panic braking can convert a recoverable moment into a crash.
Bike behaviour and technology
Tyres, electronics and setup are central. Tyre grip and condition determine the available traction window; surface changes or debris can shrink it. Electronics—traction control and engine-braking mapping—help prevent abrupt regain of rear grip that causes highsides and can also mask or mitigate slides if well-calibrated. Suspension and chassis setup influence how quickly the bike transfers load between wheels; an unstable setup can make front-end folds or unpredictable slides more likely. Mechanical failures or sudden engine behaviour are also listed among contributing factors to these crash types.
Safety and prevention
MotoGP guidance stresses technique, electronics tuning, tyre management and track risk control. Riders and teams work to keep tyre temperatures and wear in an optimal range, adjust electronic assistance to the rider's style and the track, and practice braking and corner-entry routines that reduce the chance of overloading a tyre. Trackside measures—flagging, run-off areas and gravel traps—are part of risk management but do not eliminate the underlying mechanical and human causes.
Common misunderstandings
Beginners often conflate highsides and lowsides because both start with a loss of grip; the critical difference is whether traction is re-established suddenly (highside) or not (lowside). Television replays can mislead because a highside’s violent ejection looks like a front flip, while some front-end losses can resemble lowsides on slow-motion. Another misconception is that electronics always prevent crashes: they reduce risk but cannot eliminate crashes caused by debris, abrupt rider error, mechanical failure or direct contact between riders.
Fan viewing guide
On-screen clues help identify the crash type. A rear-wheel spin and a sudden violent throw of the rider indicates a highside; a tidy slide toward the inside with the bike and rider staying low is a lowside. If a rider disappears over the handlebars or the front wheel folds at turn-in, suspect a front-end loss or braking-zone failure. Contact incidents often begin with two bikes changing line or a visible touch; braking-zone crashes usually follow heavy late-braking attempts with abrupt motions or wheel lock/grab visuals.
Closing interpretation
Knowing these crash types deepens a fan’s understanding of what they see: MotoGP is a balance between managing traction, timing inputs and accepting unavoidable risks. Highsides, lowsides, front-end losses, rear slides, contact and braking incidents each reveal a different failure of that balance—whether mechanical, electronic or human—and explain why rider technique, team setup and track management are all essential to safety and performance.
Author: William L.